I wished for and received the excellent book Charcuterie by Brian Polcyn and Michael Ruhlman around 5 years ago, not long after it came out. I was entranced by the subject and read the book from cover to cover, and one of the recipes that really enticed me was that for guanciale, an Italian cured pork jowl. I liked the idea of it for several reasons –most importantly I remembered eating it when I grew up in Italy, and later when I moved to Rome for a year. I boarded in a little monastery on one of Rome’s hilltops, and the nuns there made their own guanciale, along with other cured meats, olives, etc. Guanciale was a good choice for a first cured pork product also because it’s relatively undemanding with regard to the curing environment. Sure, if you have a curing cellar or a curing chamber, your guanciale will be great, but if you don’t have a cellar or a chamber, a cold north-facing window with a few very basic DIY elements are perfectly adequate.
It wasn’t until this past November that the stars aligned and I finally had a freshly harvested pig jowl to work with. I’d attended the fantastic NOFA-sponsored Whole Hog workshop where I got to participate with and learn from a great group of pig fans, including master butcher Cole Ward and Chef and charcuterie enthusiast Frank Pace. That weekend we worked on two pigs, and when I noticed this one jowl sitting there looking lonely, I asked the farmer/owner if I might buy it. She agreed and it came home with me. I had especially asked to do my first hands-on meat cutting, under Cole’s supervision, on the head, and I’m particularly pleased to being making this first guanciale with a jowl that I cut myself!
I followed the directions in Charcuterie (on page 47) for making the cure, a mix of kosher salt, deep dark organic brown sugar (my tweak, instead of plain white sugar), garlic, crushed peppercorns, and a small bunch of thyme.
One important note if you buy this book (which I strongly recommend): I’ve seen editions of this book which for some odd reason do not have the guanciale recipe included. Not sure why, but if it’s guanciale that interests you, I’d buy this at a bookstore or someplace where you can verify that your edition includes the guanciale recipe on page 47.
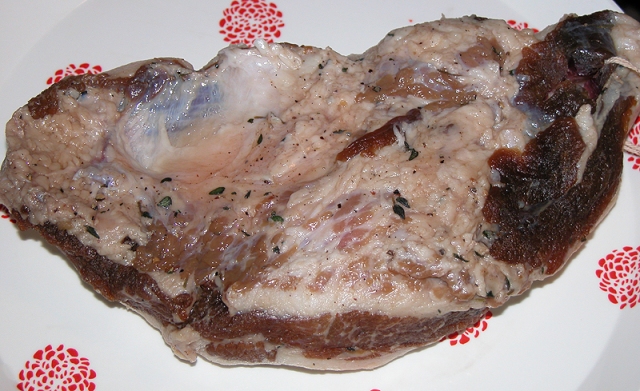
After massaging the cure into the jowl inside a sturdy ziplock bag, into the fridge it went on the 22nd of November. Every other day I would turn the jowl over, giving it a bit of massage to really get the cure into the meat. After two days there was quite a bit of moisture coming out, and by 7 days I deemed the piece of meat to be as firm as I felt it should be. Essentially, the meat starts out quite floppy, and by 6 or 7 days, it’s become a bit firmer. Here is what the jowl looked like once it was done curing in the fridge:
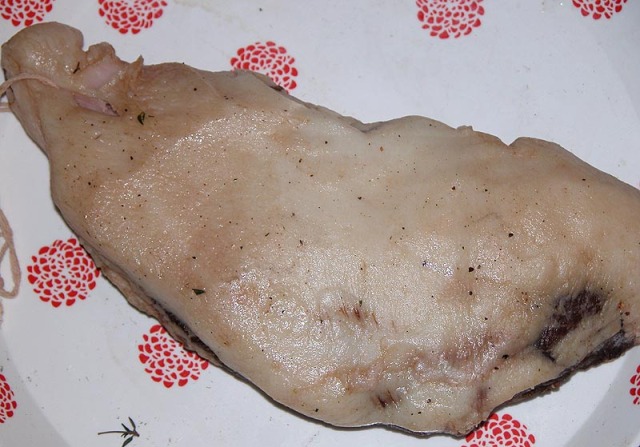
And here’s the fat side of the jowl:
Next was to hang the cured jowl. Now, I have a teeny tiny flat, no access to a cellar, and I’m not yet ready to build my own curing chamber out of an old fridge, so after doing a bit of research, and receiving some encouragement from several more experienced charcuterie makers, I decided that a setup in one of my two north-facing windows would be my best bet. I have only two windows in my two-room flat, and just in general I like to keep the window in my less-used room cracked an inch or so even in the cold of winter so I get some fresh air. I bought a thermometer/hygrometer to see what the temperature and humidity were like in that spot, and when I first tested the spot it was around 50F with around 35% humidity. I set up a plastic garden crate with a clippy-hook tied on the top side, hung the guanciale (which had a peice of butcher’s string tied in a loop through a hole I made at one end) from the clippy-hook, and draped a towel which I had soaked in water and then wrung out over the whole contraption. Here’s what it looked like minus the wet towel:
Very VERY basic! But I reckon it might encourage you, if you’re like me and don’t yet have the means to construct a curing chamber, to be adventurous and give meat curing a whirl. The photo shows my guanciale hanging from it’s clippy-hook, my new little thermometer-hygrometer, and a plate to catch any potential drips. In fact, there were virtually no drips, at least nothing major –maybe 1/3 teaspoon during the first week of drying. When I wasn’t photographing the setup, a second crate was situated in front of the one pictured, and a wet towel was draped over the whole contraption.
The guanciale started air drying on November 29th and the temperature ranged from 35F to 57F during the month. The humidity ranged from 25% to 55%. The humidity was higher when I had the wet towel draped over, but after the first week or so, I was less regular in my towel maintenance, and the humidity was lower. All in all, my humidity numbers were lower than ideal, but I still got a glorious piece of cured meat!
I suspect that higher and more regulated humidity would mean that the guanciale could cure slower and longer and therefore achieve even more fantastic flavor, but honestly –there’s flavor to spare in this first one so I’d happily use this setup again.
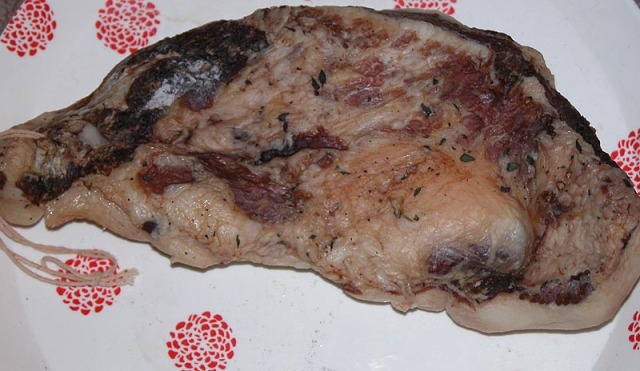
Here’s a photo of the finished guanciale:
Notice the whitish patch between 22:00 and 23:00 in the above photo? That’s the only bit of mold-like growth on my guanciale, and it’s almost indiscernable. I’ve read that this is a normal and harmless aspect of air dried meats.
I can’t tell you how thrilling this whole process has been, and how much I’ve looked forward to my first taste 🙂
I cut a few slices this morning, and tasted a thin slice. The flavor and smell are really incomparably delicious: sweet, savory, and porky in a way that I haven’t really experienced since Italy. I especially loved the toothsome fat which was at the same time soft and almost crunchy. It’s hard to describe, but it’s not the same as other cured meat fat I’ve tasted. It’s most similar to a good un-smoked bacon, but richer and fattier and more nuanced.
I ate one thin slice raw –it was salty, rich, and yummy. The rest of the slices I chopped relatively small and fried them in a medium skillet with no added fat.
And then made a little guanciale and egg scramble, topped with a bit of scallion and with a few thin slices of home-made Vermont-grown wheat oat and millet bread. A delicious second breakfast (it’s second Christmas day in my family’s tradition, and I had leftover Ris a lá mande with dark cherry sauce for my first breakfast).
About the scallions: I learned a neat thing this fall. I harvested the last of my scallions in late October, and when I cleaned and trimmed them for storage, I kept the root ends with about 1/2 inch of scallion still attached:
I potted all the roots into a big pot, and it sits in my warmer north-facing window, and look how they’ve grown:
How excellent is this! I’ve been clipping scallions as I need them and they just keep coming back! Fresh tender scallions in mid-winter is a Very Good Thing.








Pingback: Items of Interest from around the ‘net | Nose To Tail At Home
This looks great. Nice work.
Thanks! I’m having to restrain myself from eating it in some fashion at every single meal 🙂
I like the scallion pics 😀 😀
Sis
You make me giggle, O Vegetarian Sis 😉
Oh how I love cured meat.
That’s a neat trick w/the scallions!!
Thanks Amy! I’m trying to get away from morning work so I can make a couple of fried eggs on toast, each with a slice of fried guanciale 🙂 Work is currently Very Absorbing!
I learned about the second generation scallion thing a long time ago when I tossed a bunch of root ends on the compost pile and they took off and started growing. LOL
I keep some potted up all winter.
~Martin
Hej min pige,
The Pig’s Head Pozole we had for dinner last night was amazing, tasty and perfect with it’s blend of heat and fresh raw veggies. Tak! mor
How long did you air-dry the Guanciale for in total please?
Pingback: Potato, Onion, and Cheese Frittata
Pingback: Potato, Onion, and Cheese Frittata